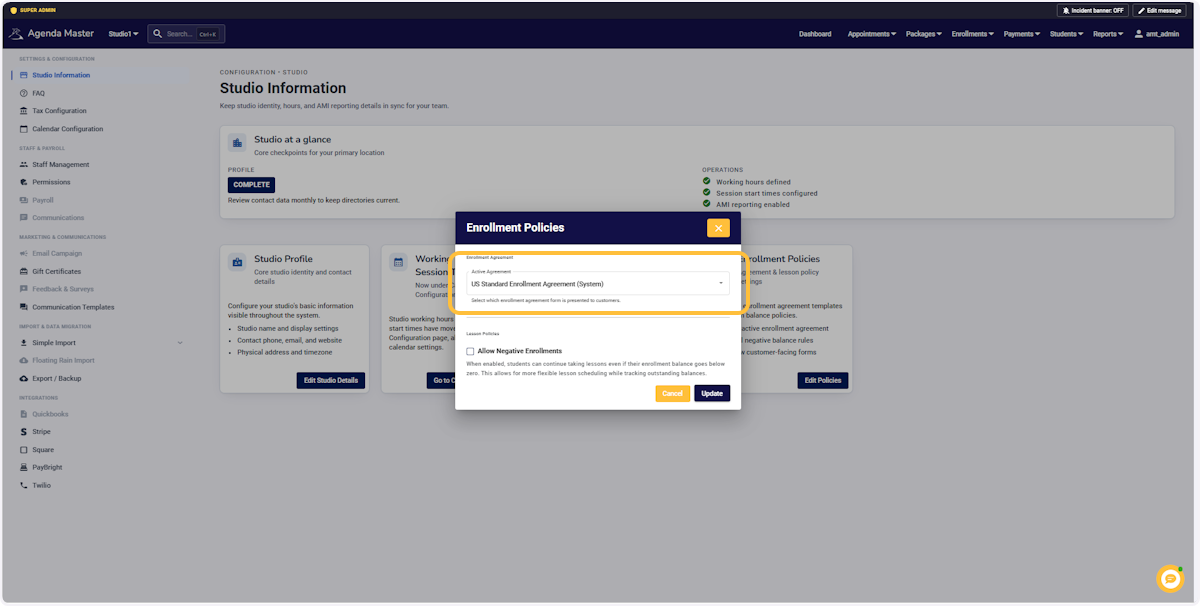
Studio Information/Working Hours/Session Start Times/Enrollment Policies #
Click on User Account and then choose Configuration #

View Studio Configuration Page #
This page allows you to personalize your Agenda Master.
First: See that your Studio Information “NEEDS ATTENTION”
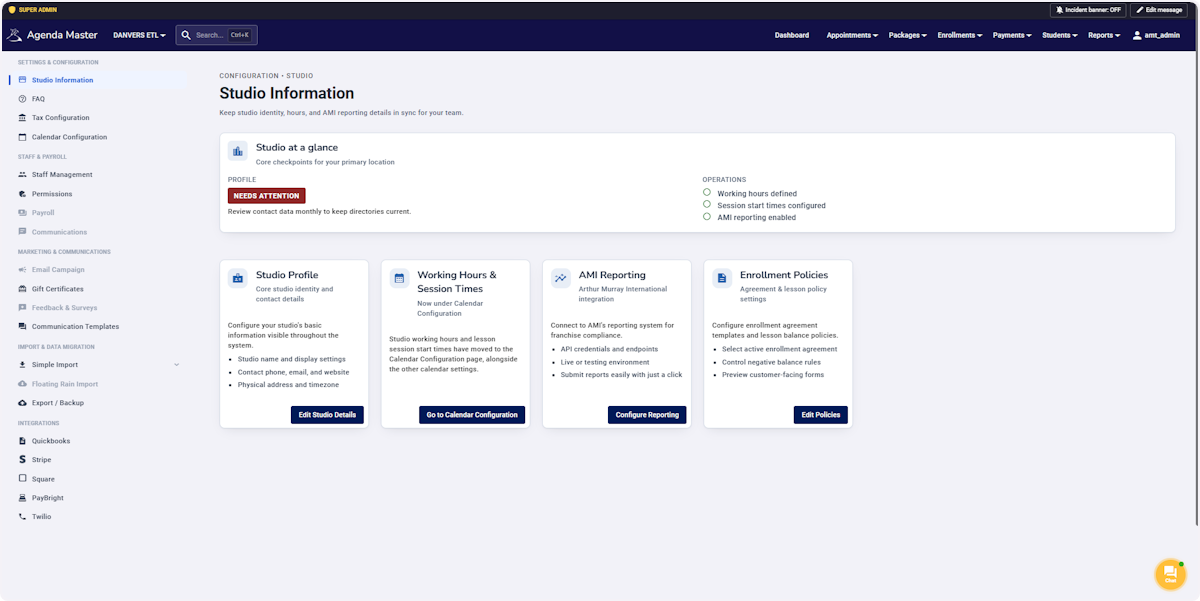
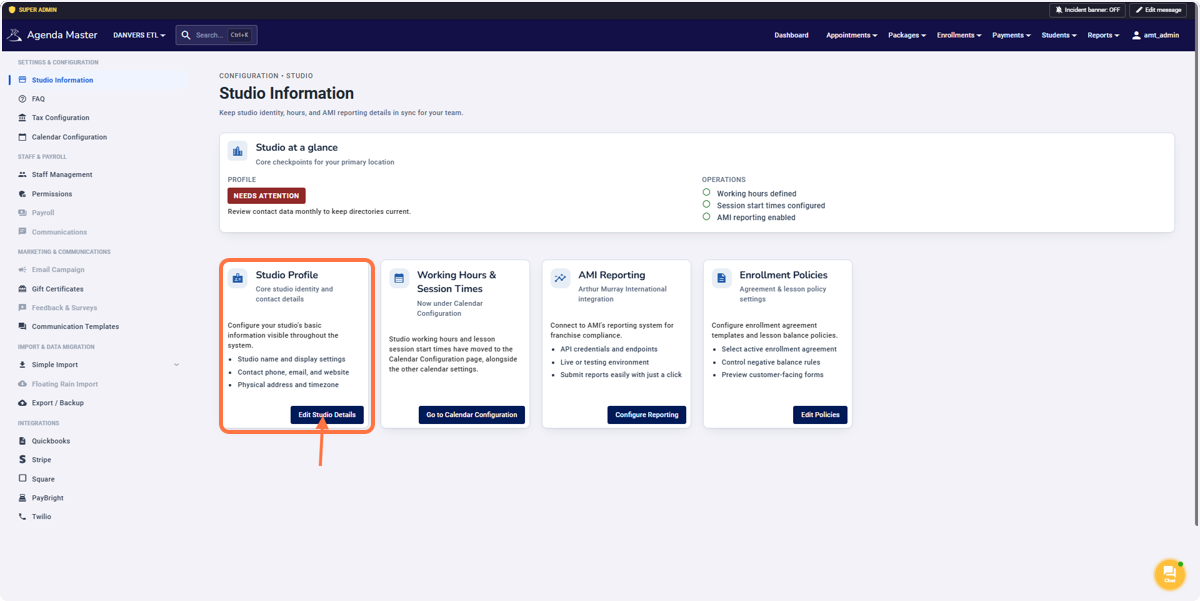
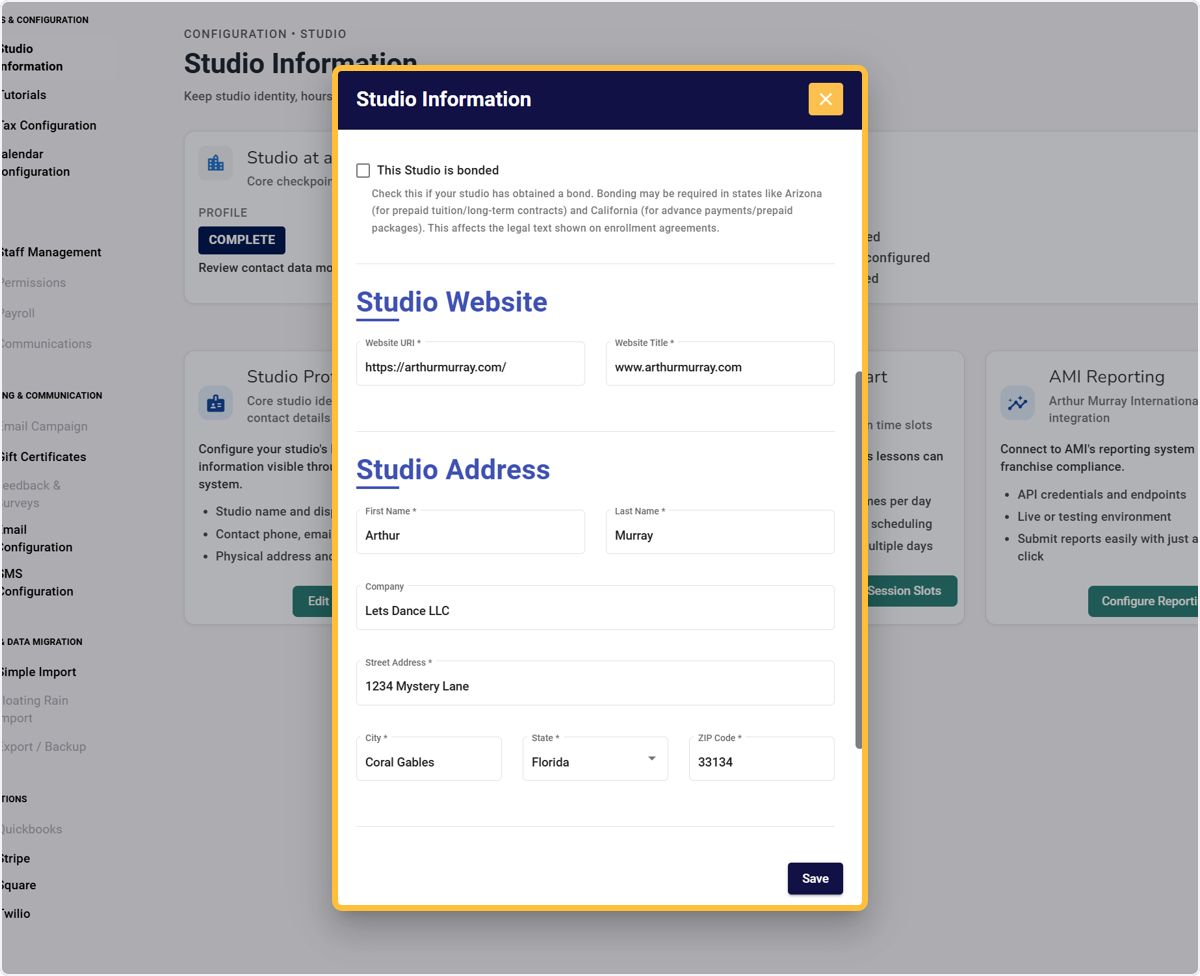
Click on Studio Profile…Edit Studio Details #
Input all STUDIO Information #
This information will be displayed on your Enrollment Agreement, along with your Text and Email Reminders. Please make sure to use your STUDIO Information.
Display Name: Typically Arthur Murray of (City)
Studio Email & Studio Phone
Your TIMEZONE is crucial if you plan for so many items within AM. But also used the automatic email or text features within Agenda Master.
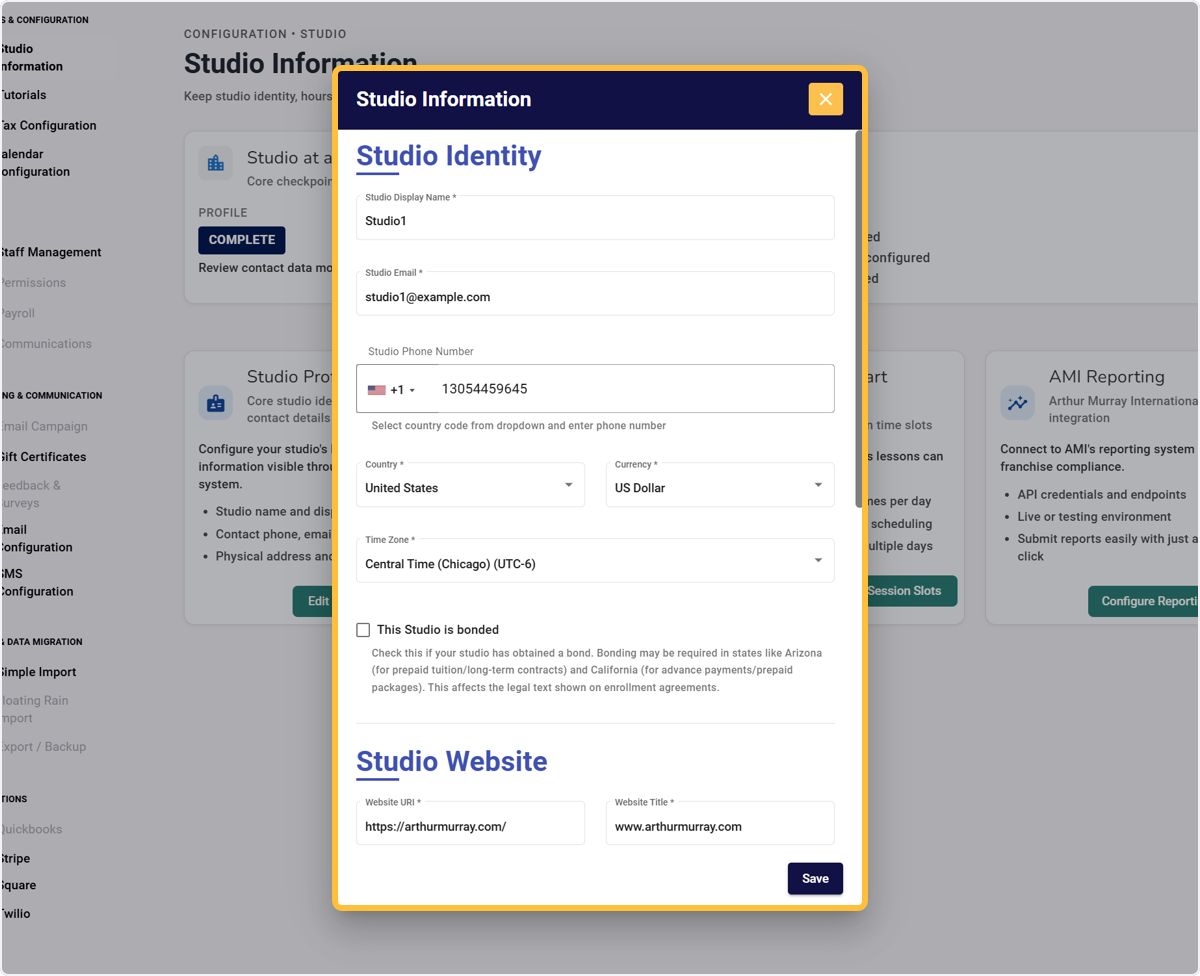
Continue putting in your Studio Information and Hit Save #
Website: Copy and paste your URL AND type it with just the www.____.com
Enter the Franchisee name, The Business Corporation Name then the Studio Address
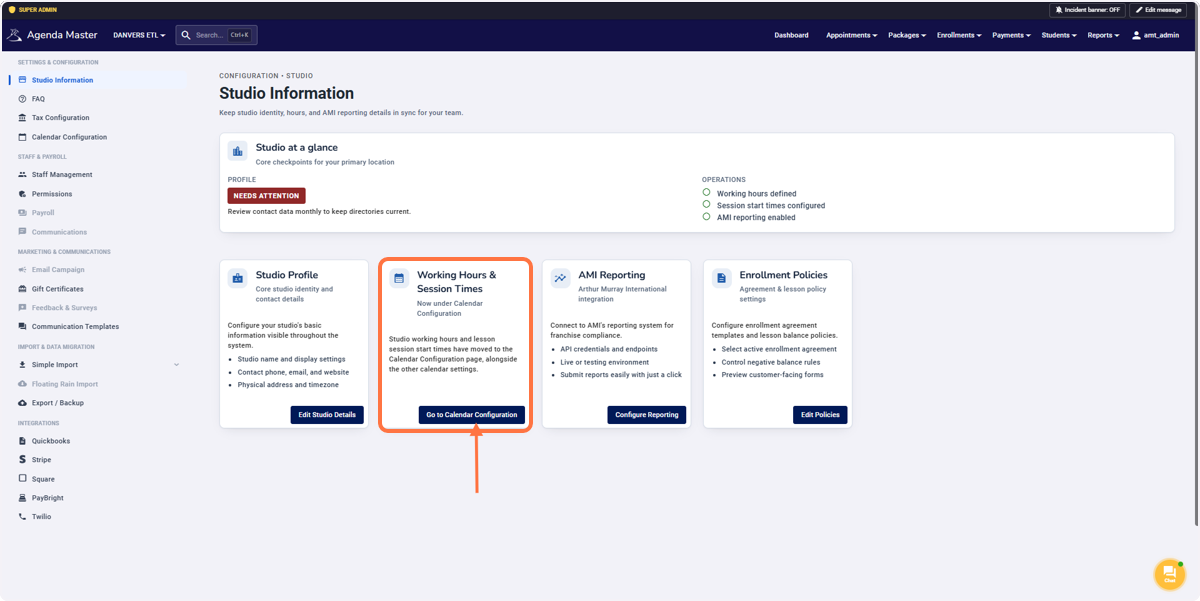
Click on Adjust Hours to put in the Working Hours and Session Start Times #
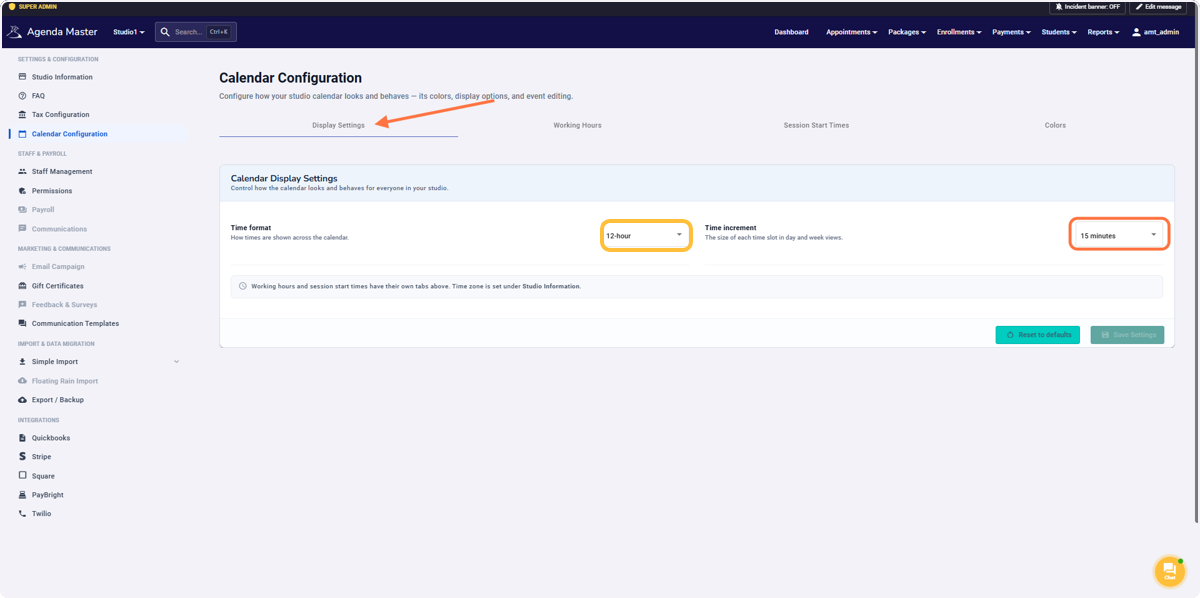
Time Slot Display Settings #
You can choose a 12hr or 24hr display, and time allotment for sessions.
(We recommend 15 min increments for ease of use/adjustments.)
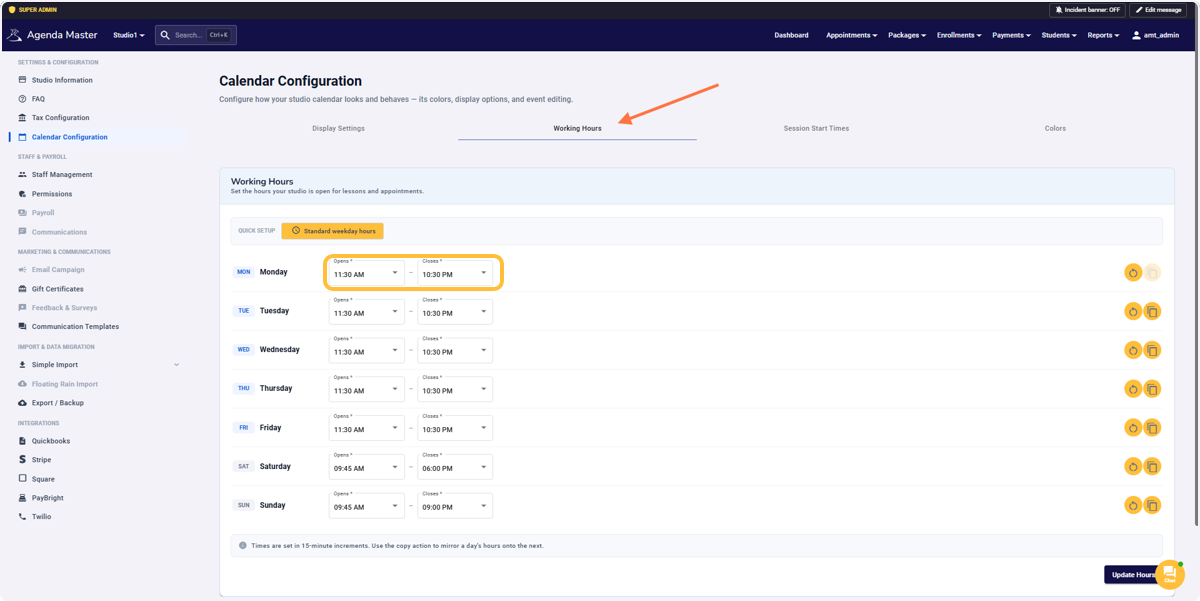
Working Hours #
These times will be what shows on your Day View/Booking Sheet and can be customizable for each day. You can use the copy button (on the right) or change the hours for each day. Hit Save when finished.
I suggest giving yourself 30 mins before the first session and 30 minutes after the last one.
***If you are closed on a specific day, set up the normal day hours so your calendar doesn’t jump around
Click to Session Slots and open Monday #
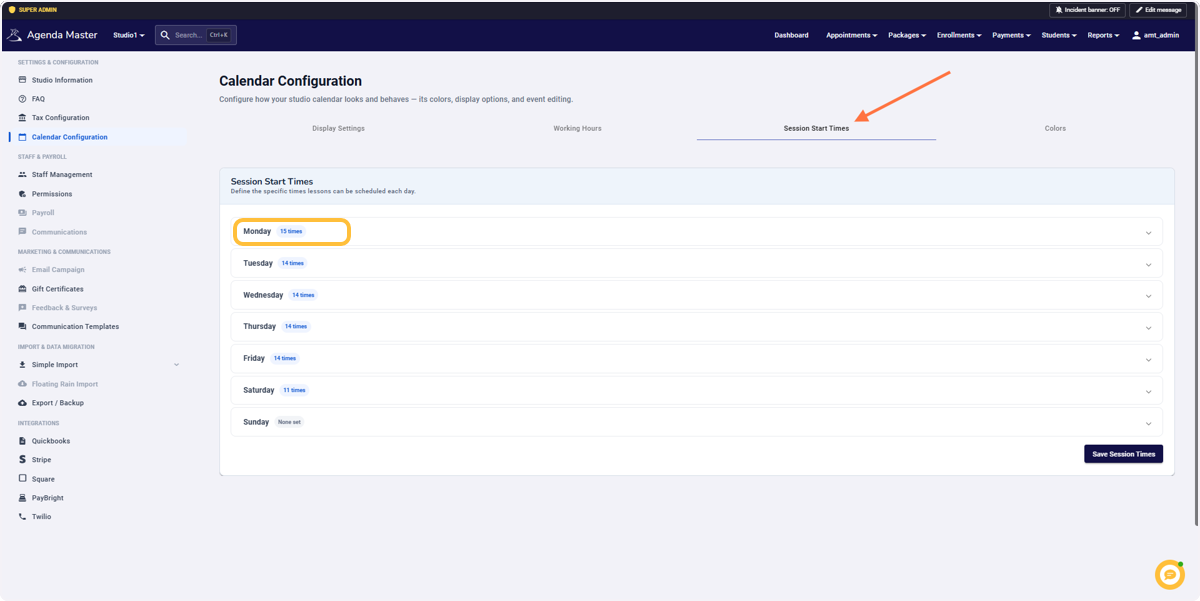
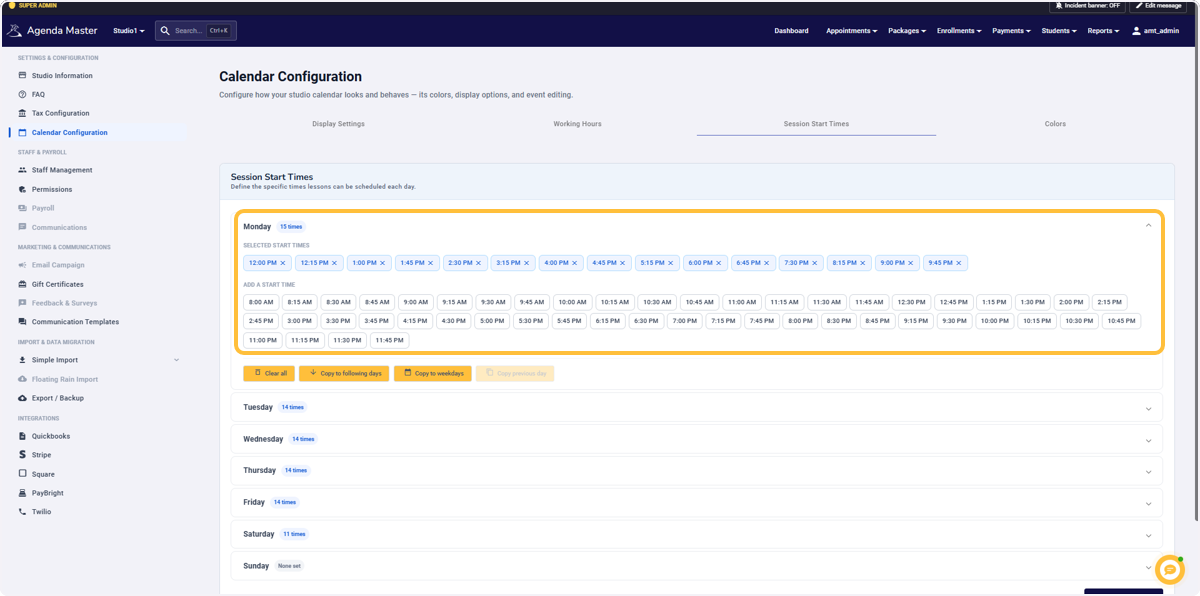
List your Session Start Times and Click Save when Done #
Available Session times are in 15 minute increments. Clicking the available times from the bottom will move it up to selected times. Clicking “x” will move the time back to available times. You can set up each day differently, or “Copy” to each of the other days. Make sure to save when you’re done.
This feature creates a gray line across your day view making Scheduling easier for the staff.
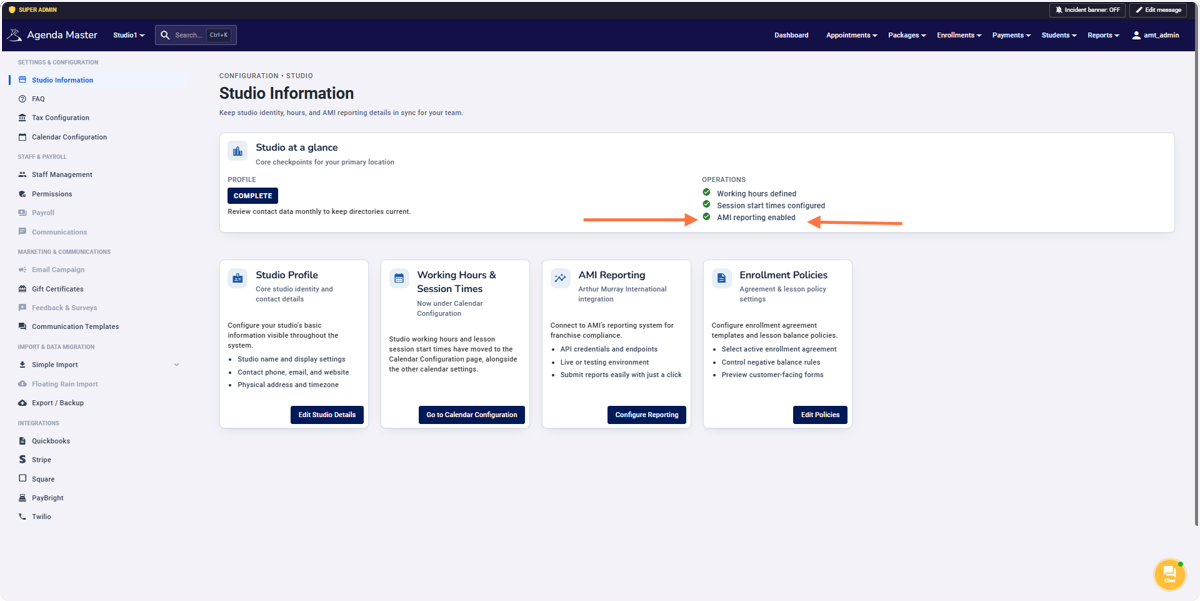
Verify that you have a Checkmark on Reporting #
This should have been done by AMI before Bootcamp
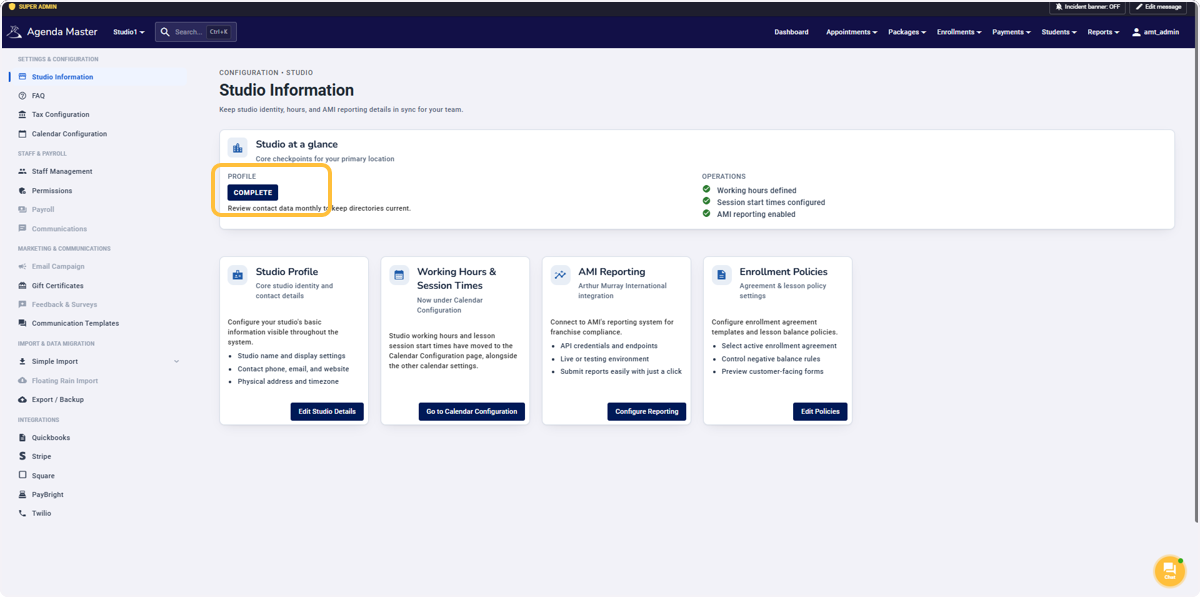
The “Needs Attention” alert should change to “COMPLETE” #
Verify Enrollment Policies #
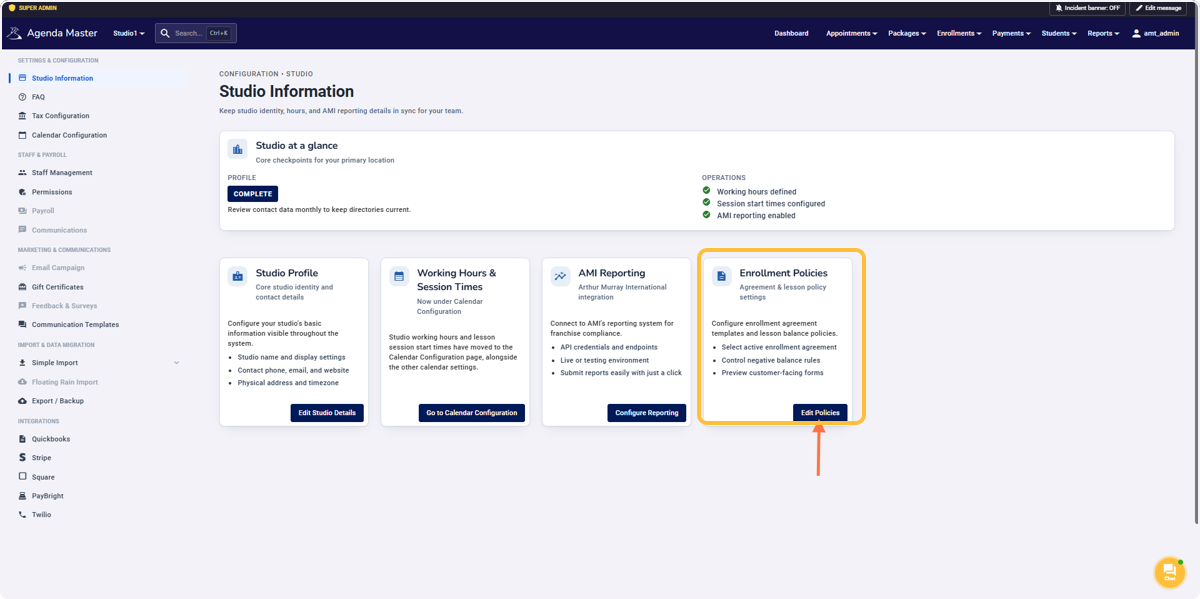
Your specified Country/State/Province Enrollment should default to your country choice in the Studio Info. But verify it to make sure. Then hit save. #
** Ignore the negative lessons checkbox and check with us in the bubble if you want to know more.